One of the advantages of modern pre-painted miniatures is that there is usually a glut of suitable figures available in the after-market. Right scale, more or less, and covering both the usual fantasy tropes as well as some interesting monsters. Many of these, especially those that are reasonably priced ($1-2 each, sometimes a little more or less, especially at conventions) come from other games and other lines.
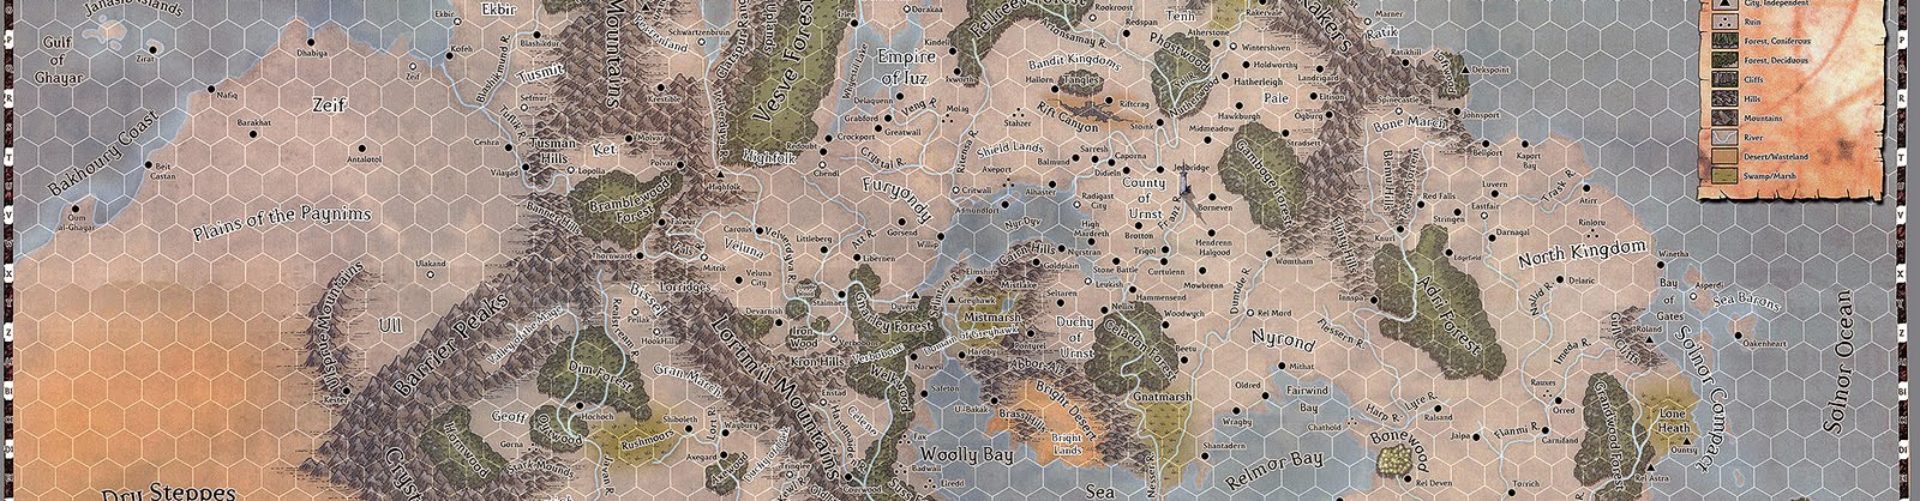
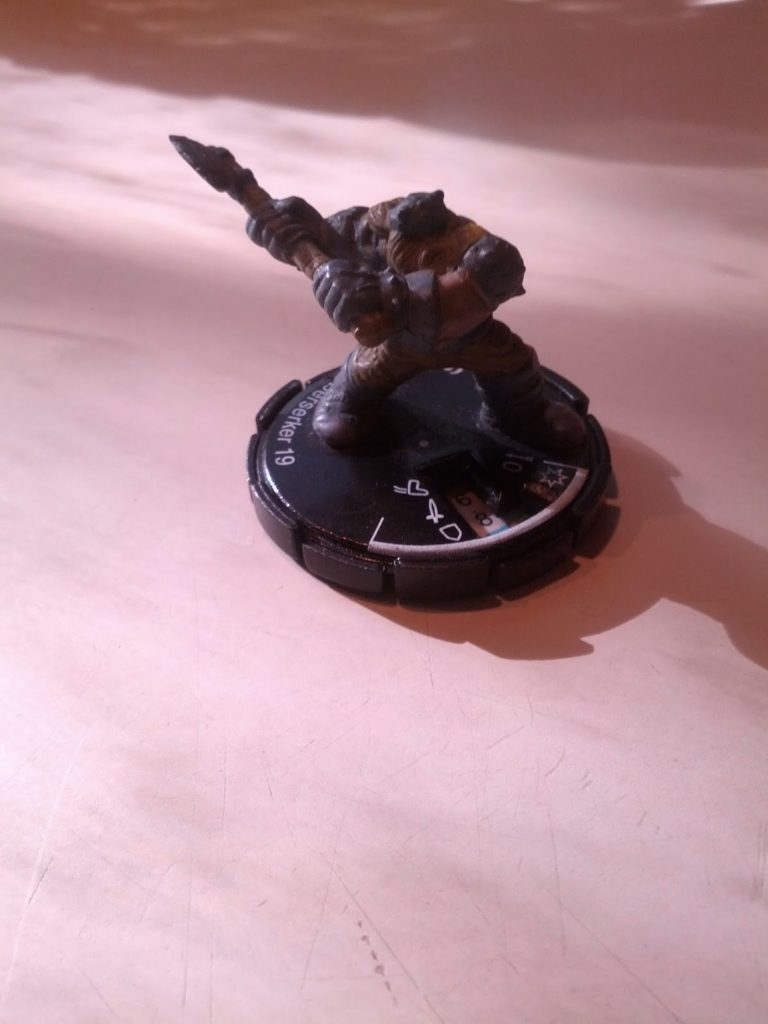
One of the problems with doing this is that such miniatures come with weird bases, bases that have “Heroclix” type dials, odd sizes and colors, etc. In later editions of D&D, miniatures should have standard-sized bases, as it has an impact on movement, zones of control, etc. You can get away without doing it, but it looks nicer on the table when things match up.
Usually, the answer is to use metal washers of the correct size, possibly painting them black. They will certainly do the job, but they have the disadvantage of having the incorrect thickness and a hole in the middle (the hole is smaller if you use a “fender washer”, but it’s still present). Naturally for someone as anal retentive as I am, it simply won’t do.
The quest for suitable replacement bases was a long one. Most commercially available bases have some sort of terrain molded into the base, making it look like flagstone, etc. Nice, but unfortunately the “official” D&D miniatures use plain black bases. Litko makes a very nice plain base, but they’re either wood or magnetic, and not quite thick enough. Battlemart makes some plain white ones, but they’re just ever so slightly the wrong size, because they’re metric. Annoying. Proxie models makes ones with a raised lip and a slightly textured bottom; I might get a batch of them to use with my metal figures, and fill in the depression around the metal base with flocking, but until I’m prepared to do that for all my figures, both metal and plastic, I went looking for something suitable for the plastics I already had.
And lo! and behold after a lot of searching, I found something suitable from an industrial plastics supply company. So suitable, in fact, that I’m going to start selling them in small batches, since it took way too much effort to find something that should be ubiquitous and which I think at least some gamers are going to find really useful.
Here’s how it works.
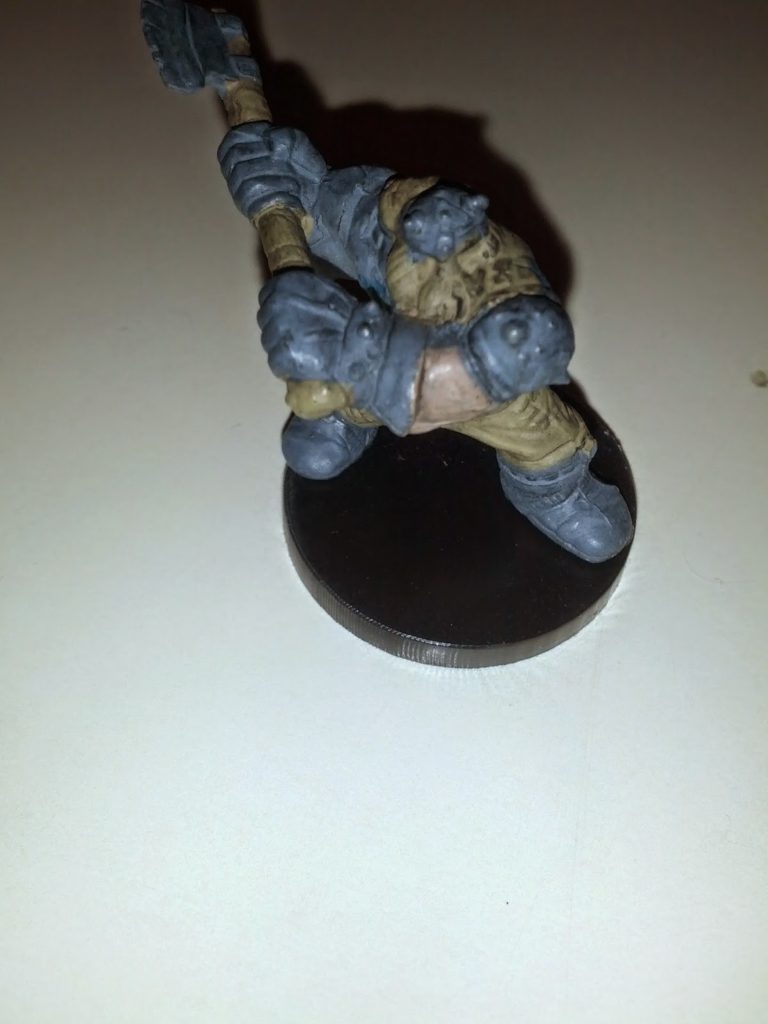
First, you start with a suitable figure on a large/incorrect/unwanted base:
Next, carefully pry the figure off the base with an x-acto knife. They’re usually attached with super-glue, and it’s possible to pop them off without damaging the figure. You have to be careful on two counts. First, you don’t want to slice into your fingers, especially given the natural way to hold the figure while you’re gently prying with the knife. Second, you want to make sure you’re not cutting into the plastic of the figure itself; when it comes off, there shouldn’t be anything left on the base except glue:
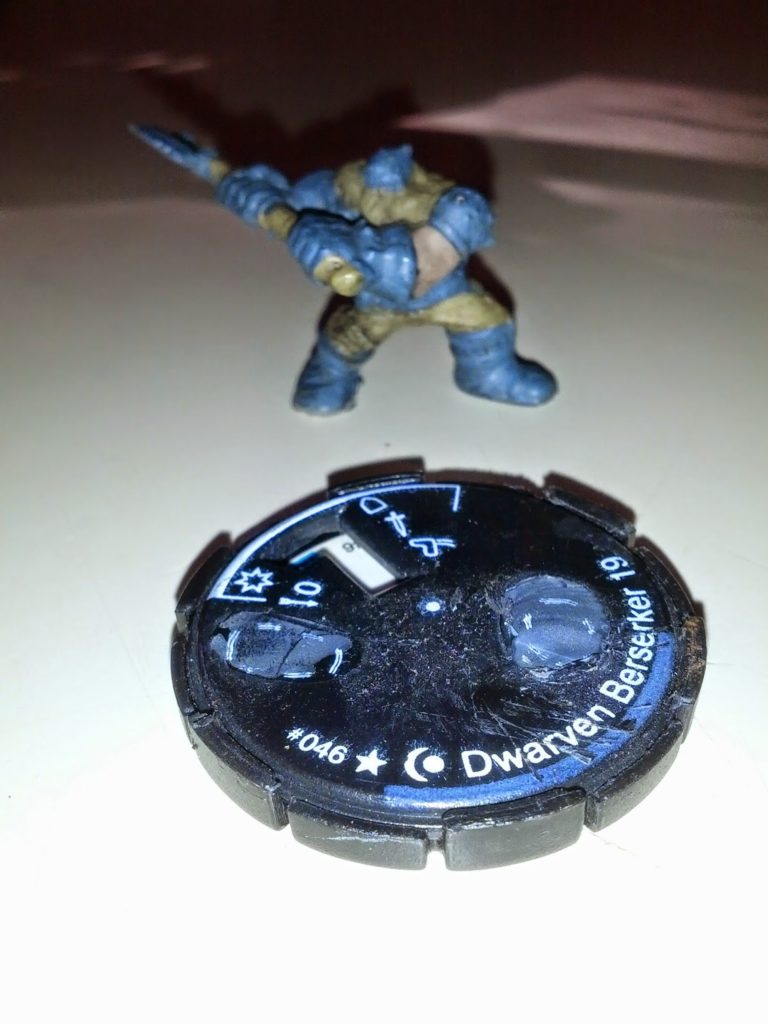
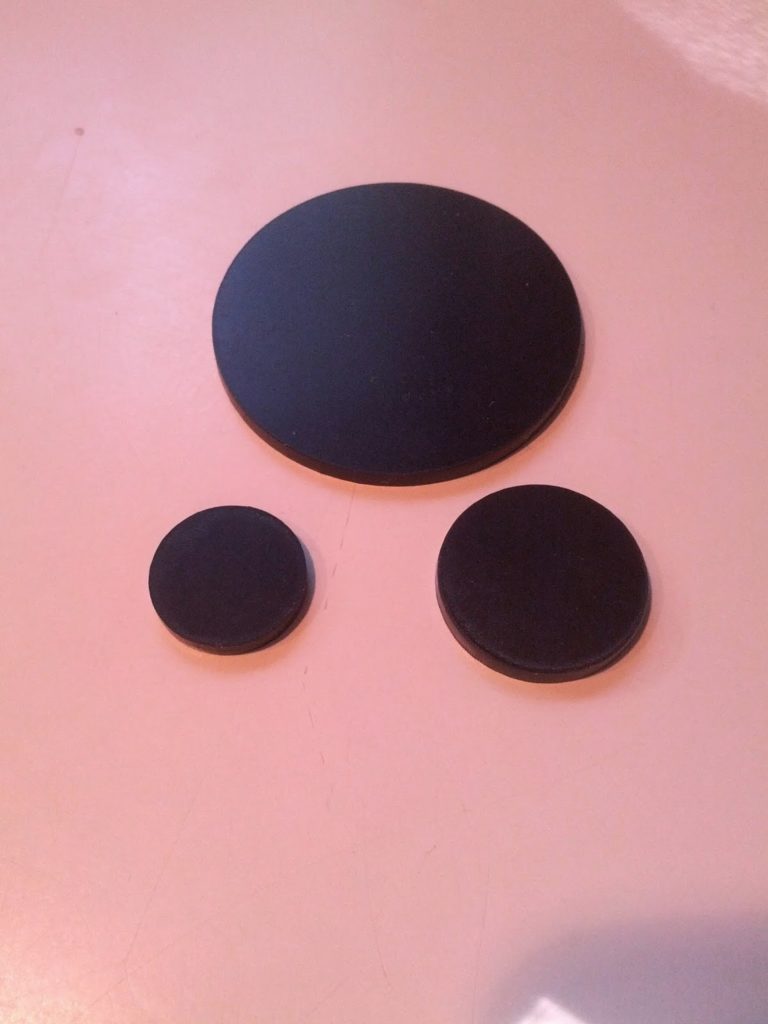
Now, here is the replacement base. It’s dull black, the correct diameter (1″ for a medium-sized creature), and the correct thickness (1/8″):
A dab of super-glue on each foot, hold it down for a few seconds, and voila!
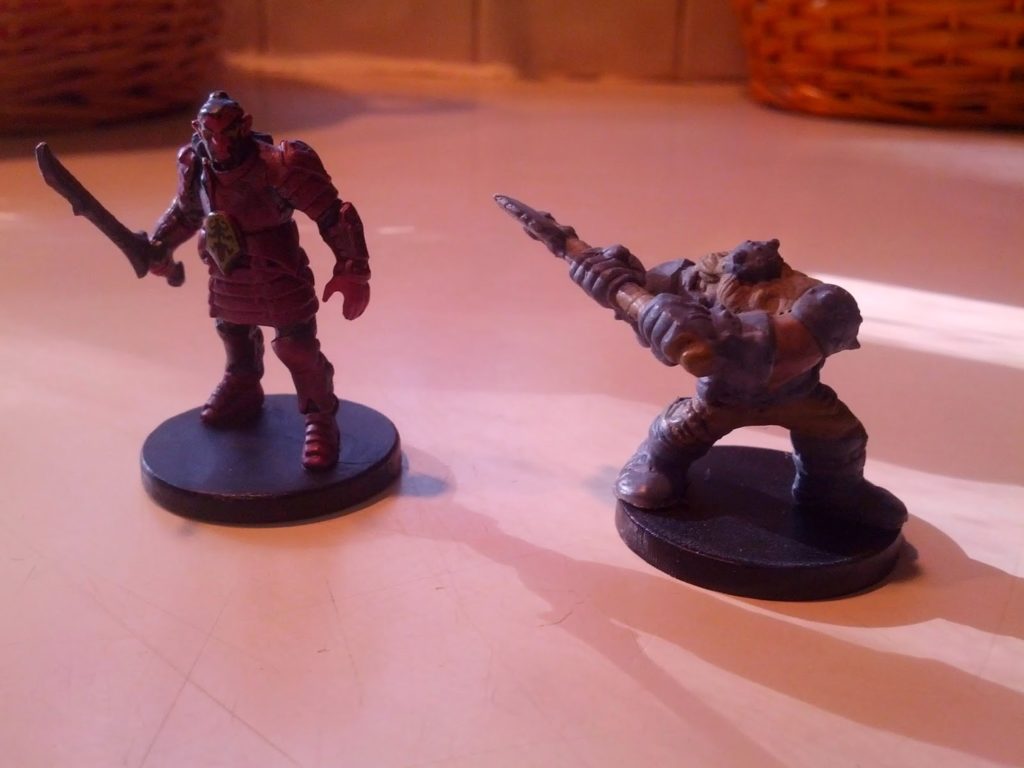
Here’s the above dwarf with an official Wizkids D&D figure for comparison. The bases look almost identical at a casual glance, which is exactly what I’m looking for:
And the best part is, they come in the proper diameters for large, medium, and small creatures:
An official announcement of availability will be made once I get some of the details down. I might start at conventions just to test the waters, but if anyone absolutely has to have these now now now, email me and I’ll see what I can do.


I've been doing this for a while now. I really like having so many cheap alternatives, especially for generic fantasy archetypes, as well as the oddball creature that my players won't instantly recognize.
Not sure if you'll find this video useful, as the process is pretty straightforward, but I did this a few years ago: http://www.outsydergaming.com/2011/12/using-mage-knight-figures-for-warhammer.html
I am curious to see how this venture unfolds for you, and I may be one of your first customers. Looking forward to hearing more!
Nice little tutorial video there. Exactly what I did.
To easily remove the base from Heroclix miniatures, tos them in the freezer first. The plastic material of the mini remains slightly pliable, but the glue becomes brittle.
Ooh good tip. I'll try that tonight.
A better way to debase them is to boil them. Their melting point is far beyond that of boiling water and they cut like butter. You can also reshape bent weapons and reposition arms this way.